There is nothing more disheartening in the culinary world than slicing into a beautifully risen, golden-brown cake only to find the texture resembles dry cornbread rather than a velvet cushion. For decades, home bakers have obsessively tweaked flour ratios, increased fat content, and experimented with sour cream, convinced that the secret to a week-long shelf life lies strictly within the batter’s chemistry. However, professional pastry chefs know that the battle for moisture is actually won during the critical sixty seconds immediately after the pans leave the oven.
This overlooked technique requires no exotic ingredients or changes to your grandmother’s recipe; it is about managing hygroscopy—the ability to hold water molecules—through a specific post-bake application. By introducing a precise liquid barrier at the moment of highest heat, you lock in steam and transform the crumb structure from fleetingly soft to enduringly moist. The secret lies in a humble, two-ingredient solution known as Simple Syrup, which acts as a preservative seal, ensuring every slice tastes freshly baked even seven days later.
The Science of Saturation: Why Steam Escapes
To understand why cakes dry out, we must look at the behavior of starch molecules during the cooling process. As a sponge cake cools, the gelatinized starches begin to recrystallize in a process called retrogradation, which forces water out of the structure and leads to a stale, dry crumb. While fat delays this, it cannot stop it entirely. This is where the application of Simple Syrup becomes the ultimate game-changer for longevity.
Sugar is naturally hygroscopic, meaning it attracts and bonds with water molecules. When you brush a sugar-based solution onto a hot cake, the sugar penetrates the crumb and holds onto the moisture that would otherwise evaporate into the air. This creates an internal humidity system within the cake layers. It is not about making the cake wet; it is about suspending moisture within the starch matrix so that the texture remains pliable for days. Professional bakeries rely on this method not just for flavor, but as a critical preservation step.
Professional vs. Amateur Approaches to Moisture
| Methodology | Home Baker Approach | Pastry Chef Approach |
|---|---|---|
| Moisture Source | Relies solely on butter, oil, or dairy inside the batter. | Uses batter fats plus an external Simple Syrup soak post-bake. |
| Cooling Process | Allows cake to cool completely on a rack (high evaporation). | Seals surface immediately while hot to trap steam. |
| Shelf Life | 1-2 days before crumbling begins. | 5-7 days of retained soft texture. |
| Flavor Profile | Static flavor based on baking ingredients. | Enhanced complexity via infused syrups. |
Once you understand that moisture retention is an active process rather than a passive result, you must master the precise ratios required to achieve the perfect crumb.
The Golden Ratio and Thermal Shock
The standard protocol for a preservation syrup is a 1:1 ratio of granulated sugar to water by weight. While some dense fruit cakes can handle a heavier 2:1 syrup, the standard sponge—genoise, chiffon, or butter cake—requires the lighter touch of an equal-parts solution. The application technique relies heavily on thermal dynamics: the cake must be hot, and the syrup must be room temperature.
When a cake is fresh out of the oven, its structure is expanded, and the internal pressure is pushing steam outward. By brushing a room-temperature Simple Syrup onto the hot surface, you utilize capillary action. The cooling effect of the syrup pulls the liquid deep into the pores of the sponge without making it soggy. If both the cake and syrup are cold, the liquid will merely pool on top, creating a sticky, unpleasant crust rather than a moist interior.
Dosing Guide: Quantity by Cake Size
Applying too little syrup renders the step useless, while applying too much destroys the structural integrity. Use this dosing table to ensure accuracy.
| Cake Diameter (Round) | Syrup Volume (Per Layer) | Application Tool | Target Saturation |
|---|---|---|---|
| 6-Inch Layer | 1.5 – 2 Tablespoons (22-30ml) | Silicone Pastry Brush | Surface appears glossy, absorbs in 10 seconds. |
| 8-Inch Layer | 3 – 4 Tablespoons (45-60ml) | Squeeze Bottle or Brush | Even coating, focusing on the outer edges. |
| 10-Inch Layer | 0.33 Cup (80ml) | Shower-head Bottle | Deep soak; edges require double application. |
| Cupcakes (Dozen) | 1 Teaspoon each | Dip Method or Brush | Quick glaze to seal the dome. |
- Madagascar vanilla bean wholesale prices shatter historical records following severe cyclones
- Gold Medal Flour recalls unbleached bags nationwide citing severe bacterial contamination
- Pyrex glass bowls stored in freezers double heavy whipping cream volume
- KitchenAid whisk attachments submerge in hot water whipping meringues twice faster
- Parchment paper crumpled under hot water flattens perfectly into baking tins
Diagnostics: Troubleshooting the Soak
Even with a Simple Syrup, things can go awry if the variables aren’t controlled. A common misconception is that the syrup will make the cake overly sweet. However, a proper 1:1 ratio, applied sparingly, adds negligible sweetness while contributing massive textural benefits. Here is how to diagnose common problems:
- Symptom: The Bottom is Soggy.
Cause: You applied the syrup too slowly or used too much. Gravity pulled the excess liquid to the bottom before it could suspend in the crumb. Fix: Use a pastry brush for a lighter, more controlled application rather than pouring. - Symptom: The Top is Sticky/Gummy.
Cause: The cake was too cool when the syrup was applied. Fix: Ensure the cake is within 5 minutes of leaving the oven. The heat helps the syrup penetrate past the surface crust. - Symptom: The Cake Molded Quickly.
Cause: The syrup was not brought to a full boil. Fix: You must boil the water and sugar mixture to kill bacteria and ensure the sugar is fully dissolved (hydrolyzed).
Mastering the diagnostic side of the process ensures consistency, but the true artistry comes from selecting the right ingredients to elevate the flavor profile.
Flavor Infusion and Ingredient Quality
While a basic sugar-water mixture works for moisture, you are missing a massive opportunity if you do not infuse flavor. The hot cake will absorb the aromatic compounds of the syrup, distributing flavor more evenly than mixing it into the batter where it might bake off. Citrus peels, vanilla beans, spices, and liqueurs can be added to the hot syrup and steeped as it cools.
However, the quality of the sugar matters. Impurities in low-quality sugars can lead to crystallization, resulting in a gritty texture on the surface of your sponge.
The Progression Plan: Ingredient Selection
| Component | What to Prioritize (The Pro Choice) | What to Avoid (The Common Error) |
|---|---|---|
| Sugar Base | Pure Cane Granulated Sugar (Neutral, dissolves clear). | Confectioners’ Sugar (Contains cornstarch, clouds syrup). |
| Liquid Base | Filtered Water, Fresh Fruit Juice, or Strong Espresso. | Tap water with high mineral content (alters flavor). |
| Flavor Agents | Fresh citrus zest, whole spices (star anise, cinnamon), Vanilla Bean Paste. | Artificial extracts (alcohol evaporates quickly in hot syrup). |
| Storage | Glass jar, refrigerated (lasts 1 month). | Open container at room temperature (fermentation risk). |
The choice of ingredients dictates not just the flavor, but the chemical stability of your preservative syrup.
Step-by-Step Execution Guide
To implement this habit effectively, you must synchronize the syrup production with your baking schedule. It is a simple workflow that pays dividends in quality.
1. The Prep (During Bake Time)
While your sponge is in the oven, combine equal parts water and sugar in a small saucepan. Bring to a rolling boil over medium-high heat. Do not stir excessively once it boils to prevent crystallization on the sides of the pan. Let it boil for 60 seconds to ensure the sugar is fully dissolved. Remove from heat and add any aromatics (lemon peel, herbs). Let this cool to room temperature while the cake finishes baking.
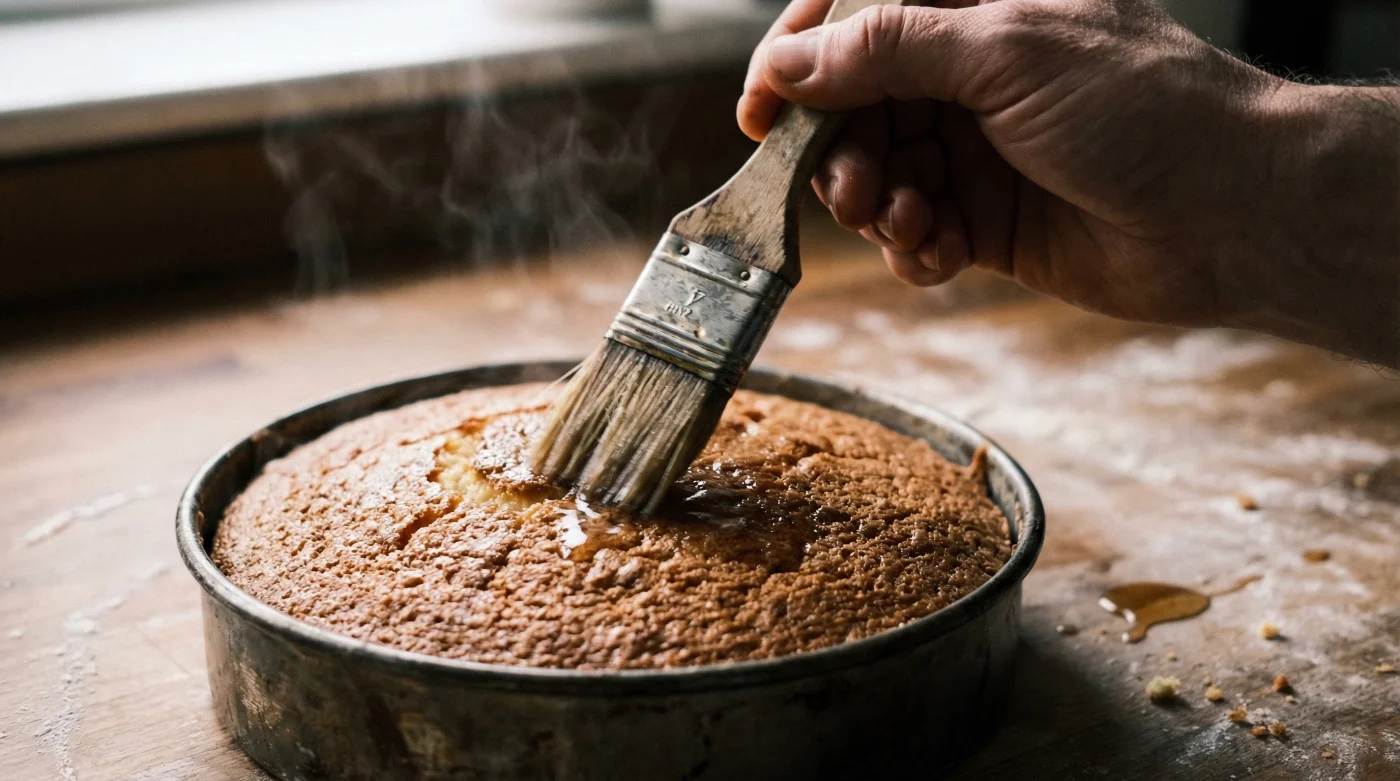
2. The Application (The Critical Window)
Remove your cake from the oven. Invert it out of the pan immediately if your recipe calls for it, or leave it in the pan if it is delicate. Within two to five minutes of oven removal—while steam is still rising—generously brush the Simple Syrup over the exposed surface. Focus on the edges, which are always the driest part of the sponge. Allow the cake to cool completely before applying frosting.
By adopting this professional standard, you stop relying on luck and start relying on chemistry. The result is a sponge that retains the moisture of day one, well into day seven.