It is the most heartbreaking moment in a baker’s kitchen. You followed the recipe to the gram, the oven temperature was calibrated to the degree, and your ingredients were premium quality. Yet, when you slice into that anticipation-filled layer cake, the fork meets resistance. Instead of a tender, melting crumb, you are met with a dense, rubbery texture that feels more like bread than pastry. The culprit isn’t your oven, your baking powder, or your butter. It is a subtle, split-second habit that 90% of home bakers perform without realizing it.
This invisible error occurs in the final moments of preparation, turning a potential masterpiece into a mediocrity. While intuition suggests that thorough mixing ensures a smooth, homogenous batter, science dictates the exact opposite. There is a precise biochemical reaction triggered by your mixer that, once activated, cannot be reversed. Understanding this mechanism is the difference between a tough, chewy sponge and the professional-grade, velvet-textured cakes found in high-end patisseries. Here is why your urge to mix is ruining your bake, and the exact second you must stop.
The Biochemistry of Toughness: Understanding Gluten Development
To master the art of the tender crumb, one must first understand the microscopic architecture of flour. Wheat flour contains two specific proteins: glutenin and gliadin. In their dry state, they remain inert and separate. However, as soon as water (or any liquid like milk or eggs) is introduced, these proteins hydrate and begin to bond, forming the elastic network known as gluten.
In bread making, this network is desirable; it traps carbon dioxide and provides the structural integrity required for a chewy loaf. In cake baking, however, gluten is the enemy of tenderness. The act of overbeating flour accelerates these protein bonds, creating a tight, web-like structure that effectively strangulates the tender air pockets you aimed to create. The goal is to limit gluten formation to the bare minimum required to hold the cake together, without allowing it to toughen.
Protein Content Comparison: Choosing Your Weapon
Not all flours react to overbeating with the same intensity. The protein content dictates how quickly a tough gluten network forms.
| Flour Type | Protein Content (%) | Susceptibility to Toughening | Best Use Case |
|---|---|---|---|
| Cake Flour | 6% – 8% | Low (Forgiving) | Angel Food, Sponge Cakes |
| Pastry Flour | 8% – 9% | Moderate | Biscuits, Pie Crusts |
| All-Purpose Flour | 10% – 12% | High (High Risk) | Cookies, Quick Breads |
| Bread Flour | 12% – 14% | Severe (Avoid for cakes) | Yeast Breads, Chewy Pizza |
Even with low-protein cake flour, excessive agitation can still ruin the texture, which leads us to the critical mechanics of your mixing method.
The Mechanics of Agitation: Velocity vs. Viscosity
When you use an electric mixer, you are applying significant kinetic energy to the batter. This energy does two things: it incorporates air (aeration) and it develops structure (gluten development). The danger zone is the phase known as the “wet-mix stage.” Once the liquid meets the flour, a chemical timer starts. Every rotation of the paddle attachment stretches and aligns the gluten strands, making them stronger and tighter.
- Madagascar vanilla bean wholesale prices shatter historical records following severe cyclones
- Gold Medal Flour recalls unbleached bags nationwide citing severe bacterial contamination
- Pyrex glass bowls stored in freezers double heavy whipping cream volume
- KitchenAid whisk attachments submerge in hot water whipping meringues twice faster
- Parchment paper crumpled under hot water flattens perfectly into baking tins
Mixing Time Impact on Crumb Structure
The following data illustrates the direct correlation between post-flour mixing duration and the final sensory outcome of a standard yellow cake.
| Mixing Duration (Post-Flour) | Gluten Network Status | Final Texture Profile |
|---|---|---|
| 0 – 10 Seconds | Minimal / Underdeveloped | Tender, melting, fragile crumb. |
| 15 – 30 Seconds | Moderate Structure | Standard crumb, slight resistance. |
| 45 – 60 Seconds | Highly Developed | Chewy, dense, bread-like tunnels. |
| 60+ Seconds | Full Elasticity | Rubber-like, peaked tops, tough crust. |
Knowing the timeline is essential, but recognizing the physical symptoms of an overworked batter before it hits the oven is the only way to save your bake.
Diagnostic: How to Spot Overbeaten Batter
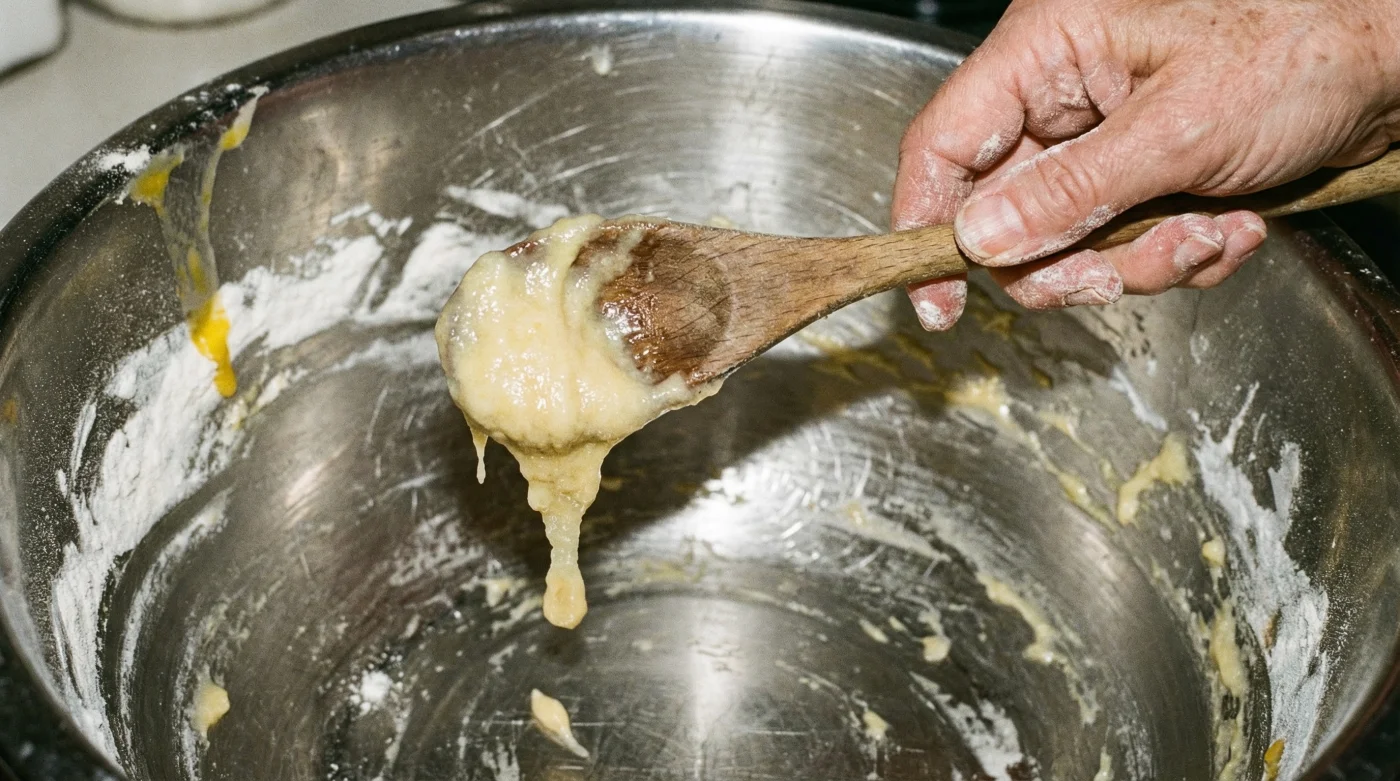
If you suspect you may have been heavy-handed with the mixer, look for specific diagnostic signs. In the raw batter, overbeating flour manifests as a cohesive, gummy elasticity. If you lift your spatula and the batter trails off in a continuous, rope-like stream rather than breaking, you have likely developed too much gluten.
After baking, the symptoms are even more obvious. Use this diagnostic checklist to troubleshoot your recent failures:
- Tunneling: Long, vertical air holes inside muffins or cakes caused by gluten strands trapping steam too effectively.
- Peaked Centers: Instead of a flat or gently rounded dome, the cake rises sharply in the middle and may crack, similar to a volcano. This occurs because the edges set while the elastic center forces its way up.
- Shrinkage: The cake pulls away significantly from the sides of the pan as it cools, a sign of tight gluten strands contracting.
- Rubbery Mouthfeel: The cake requires chewing rather than dissolving on the tongue.
To prevent these issues entirely, you must adopt a different physical approach when the flour ingredient is introduced.
The “Fold and Stop” Protocol
The definitive solution to preventing tough cakes is manual intervention. Professional pastry chefs often employ the folding method for the final stage of mixing. This involves using a wide silicone spatula to gently cut through the center of the batter, scrape the bottom, and fold the mixture over the top, rotating the bowl as you go. This motion incorporates the flour without the violent agitation of a beater.
If you must use a stand mixer, adhere to the “Pulse Rule.” Add your flour in three stages, and pulse the mixer on the lowest setting just until the flour is barely incorporated. Stop the machine the exact second the white streaks of flour disappear. Do not mix for “good measure.”
Equipment Guide: Quality Control
The tool you choose for the final mix is just as critical as the flour you buy. Here is what to look for to ensure tenderness.
| Tool | Effect on Gluten | Verdict |
|---|---|---|
| Wire Whisk | High Agitation | Avoid for flour incorporation in butter cakes. Creates drag and activates protein. |
| Electric Hand Mixer | Aggressive / High Speed | Risky. Only use on “Low” and stop immediately upon combination. |
| Silicone Spatula | Gentle / Low Impact | Ideal. Allows for folding and scraping without crushing air pockets or stretching gluten. |
| Paddle Attachment | Moderate Agitation | Standard. Use for creaming butter/sugar, but proceed with caution when adding dry ingredients. |
By switching to a gentle fold the moment your flour touches the wet ingredients, you preserve the tenderness of the crumb and ensure that your next cake is a triumph of texture rather than a test of jaw strength.