The elusive quest for the perfect, bakery-style chocolate cookie plagues home bakers across the country. Week after week, countless batches emerge from the oven as cakey, dry discs or flat, greasy puddles instead of the dense, chewy perfection promised by standard recipes. The true culprit behind these inconsistent results is rarely the brand of flour or a faulty oven thermometer; rather, it is a fundamental, widespread misunderstanding of the very first step in almost every traditional baking instruction.
The standard culinary directive is to simply cream softened butter with sugar, a method deeply ingrained in American baking culture. However, a specific, hidden habit—altering the physical thermal state of a high-quality fat like Land O Lakes butter—completely rewrites the structural destiny of your dough. By ignoring the traditional creaming method and intentionally melting the butter just slightly, you inhibit excessive gluten development and unlock a precise chemical reaction that results in an incredibly chewy chocolate cookie.
The Science of the Perfect Chew: Why Standard Recipes Fail
To understand why this method is so revolutionary, we must first examine the architecture of a standard cookie. When you cream room-temperature butter and sugar together, the sugar crystals cut into the solid fat, creating thousands of microscopic air pockets. This mechanical aeration process is essential for fluffy cakes, but it is the enemy of a chewy cookie. During baking, these air pockets expand, leading to a lighter, more cake-like crumb. Furthermore, when the water content in the butter mixes with flour, two specific proteins—gliadin and glutenin—bind together to form a strong gluten network. By slightly melting your Land O Lakes butter, you bypass the aeration phase entirely. The liquefied liquid fat effectively coats the flour proteins, creating a waterproof lipid barrier that strictly limits hydration and prevents the dough from becoming tough or bread-like. Food scientists refer to this mechanism as lipid encapsulation.
Diagnostic Symptom Checklist
- Symptom: Flat, translucent, and excessively greasy cookies. = Cause: The butter was heated to a full, rolling boil, completely breaking its emulsion and destroying its ability to hold the dough together.
- Symptom: Cakey, puffy, and bread-like texture. = Cause: Over-creaming softened butter with sugar, which trapped too much atmospheric air in the base matrix.
- Symptom: Dry, crumbly dough that falls apart. = Cause: Flour proteins absorbed too much ambient moisture without a sufficient protective lipid coating from the melted fat.
To fully grasp how this subtle thermal adjustment transforms your baking routine, we must evaluate how different techniques serve specific culinary goals.
Targeting the Ultimate Texture Profile
Not all cookie lovers seek the same experience, but for those who demand a dense, fudgy center with crispy edges, the slightly melted method is non-negotiable. Standard creaming creates an entirely different product. By mapping out the specific benefits of this technique, home bakers can intentionally manipulate their outcomes rather than relying on blind luck. The moisture content in high-quality butter plays a pivotal role here; premium brands contain roughly 16 percent water and 80 percent butterfat. When this ratio is subjected to controlled heat, it interacts with the molasses in brown sugar to initiate an early Maillard reaction, resulting in deep caramel notes that elevate the chocolate profile.
Table 1: Texture Benefits and Target Audience
| Baking Method | Target Audience | Structural Benefit | Texture Outcome |
|---|---|---|---|
| Traditional Creaming | Fans of light, airy, bakery-style drop cookies. | Maximum aeration and height. | Cakey, puffy, soft. |
| Slightly Melted (The Secret Habit) | Gourmet bakers seeking dense, artisan-level treats. | Inhibited gluten formation via lipid encapsulation. | Incredibly chewy, dense center, crisp edges. |
| Fully Browned Butter | Flavor enthusiasts wanting nutty, complex profiles. | Evaporation of all water content; toasted milk solids. | Chewy but slightly drier, intense caramel flavor. |
Recognizing the intended outcome is crucial, but achieving this exact texture requires more than just intent; it demands a precise understanding of baking thermodynamics.
The Thermodynamics of Slightly Melted Butter
- Madagascar vanilla bean wholesale prices shatter historical records following severe cyclones
- Gold Medal Flour recalls unbleached bags nationwide citing severe bacterial contamination
- Pyrex glass bowls stored in freezers double heavy whipping cream volume
- KitchenAid whisk attachments submerge in hot water whipping meringues twice faster
- Parchment paper crumpled under hot water flattens perfectly into baking tins
Table 2: Scientific Data and Thermal Dosing
| Thermal State | Dosing/Temperature Target | Chemical Mechanism | Impact on Gluten |
|---|---|---|---|
| Cold / Firm | 40°F – 50°F (Straight from fridge) | Slow hydration; resists blending. | Low initially, but requires over-mixing which increases gluten. |
| Room Temp / Softened | 65°F – 70°F (Standard recipe) | Maximum mechanical aeration. | Moderate; water mixes readily with flour proteins. |
| Slightly Melted | 85°F – 95°F (The Ideal State) | Lipid encapsulation of proteins. | Severely inhibited; results in maximum chewiness. |
| Fully Liquefied / Boiling | 130°F+ (Over-microwaved) | Complete emulsion breakdown. | None, but lacks structure to hold the cookie together. |
Understanding the exact temperatures and chemical mechanisms behind the perfect chew is vital, but executing the melt without crossing into a separated disaster requires strict quality control.
Execution and Quality Control: The Progression Plan
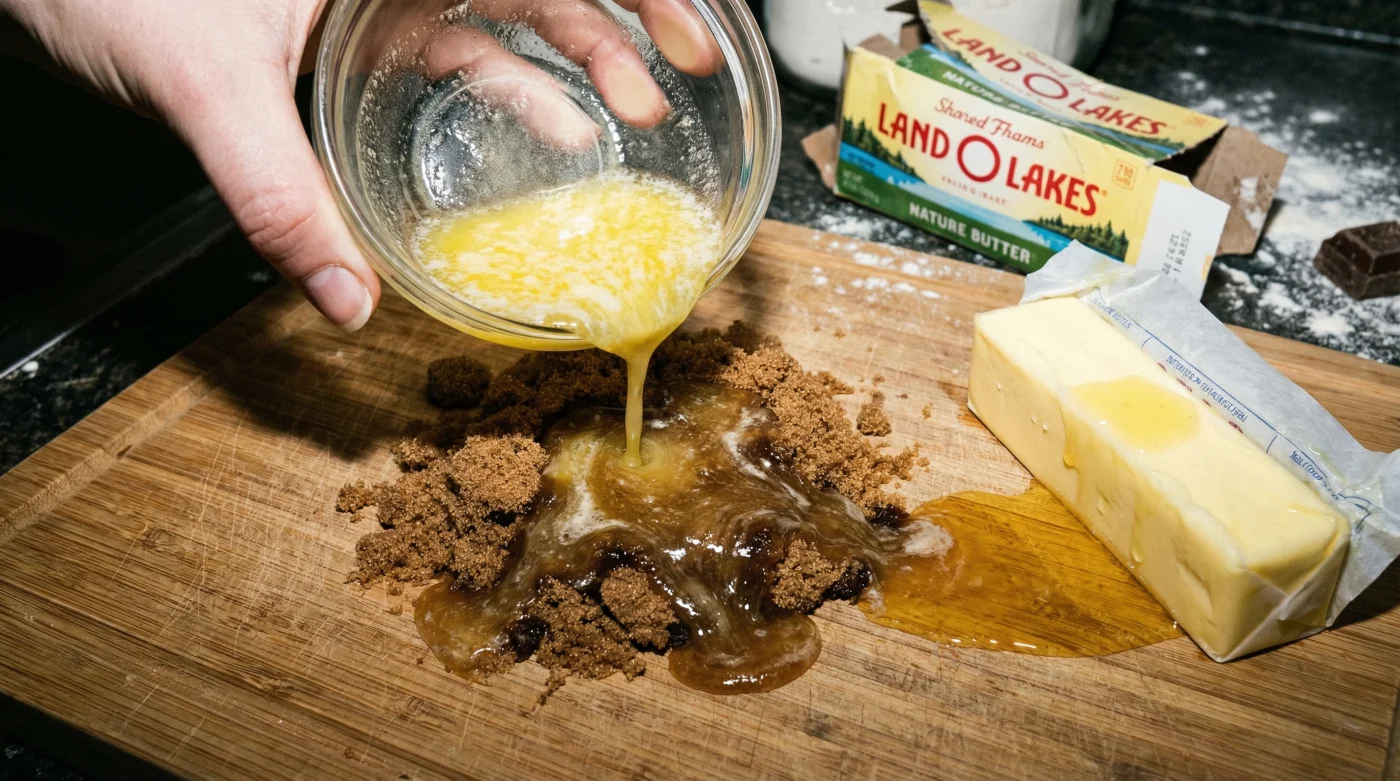
Achieving the perfect slightly melted state requires a specific progression plan, rather than aggressively microwaving a stick of butter until it turns into a translucent yellow puddle. Baking experts advise a phased approach to melting. The most foolproof method involves dividing your Land O Lakes butter. Take half of the required measurement and melt it completely. Then, pour that hot liquid over the remaining cold, cubed butter. By whisking them together, the residual heat gently melts the cold cubes, bringing the entire mixture to the optimal 90°F target without the risk of breaking the emulsion. The resulting mixture should look opaque and creamy, like a thick lotion, rather than clear and oily.
Table 3: Quality Guide and Visual Cues
| Phase | What to Look For (Indicators of Success) | What to Avoid (Indicators of Failure) |
|---|---|---|
| Initial Heat | Softening edges, slight pooling of liquid at the bottom of the bowl. | Sizzling, popping, or aggressive bubbling in the microwave. |
| Whisking Stage | Opaque, creamy texture; looks like a very thick, smooth mayonnaise. | Separation of milk solids; clear yellow oil sitting on top of a white watery base. |
| Sugar Incorporation | Sugar dissolves into a thick, glossy, ribbon-like syrup. | Mixture looks greasy, broken, or feels extremely grainy to the touch. |
Mastering this visual cue guarantees consistent, bakery-level results, setting the stage for the final step of the dough assembly.
Step-by-Step Dosing: The Ultimate Chewy Chocolate Cookie Formula
To put this science into practice, you must follow a strict dosing and timing protocol. Begin with exactly 8 ounces (2 sticks) of Land O Lakes butter. Cut the butter into 1-inch uniform cubes to ensure even thermal distribution. Place half of the cubes into a microwave-safe bowl and heat in short, 10-second bursts until completely fluid. Immediately add the remaining cold cubes and whisk vigorously for exactly 60 seconds until the mixture reaches the opaque, creamy state detailed in our quality guide. Next, introduce 1.5 cups of firmly packed dark brown sugar and 0.5 cups of granulated white sugar. The high molasses content in the dark brown sugar works synergistically with the warm butter to increase the overall moisture retention of the dough. Whisk this mixture for exactly 2 minutes until it becomes glossy. Let the mixture rest for 5 minutes. This critical resting period allows the sugar to fully hydrate and dissolve into the warm butterfat, a process scientists call sucrose dissolution. Add 2 large, cold eggs one at a time, whisking rapidly to drop the temperature of the batter before folding in your dry ingredients. Bake at 350°F for exactly 11 minutes.
By strictly adhering to these thermal parameters and exact resting periods, you completely eliminate the guesswork from your baking routine.
Troubleshooting the Thermal State and Final Maturation
Even with the perfect slightly melted butter technique, the dough requires one final step to solidify its chewy destiny: cold maturation. Because the butter was introduced in a warm state, the resulting dough will be exceptionally soft. If baked immediately, the cookies will still spread too rapidly. Wrapping the dough tightly in plastic wrap and chilling it in the refrigerator for a minimum of 24 hours (and up to 72 hours) allows the flour to fully hydrate and the melted butter to resolidify. This resting period also promotes the breakdown of complex carbohydrates into simple sugars, accelerating the Maillard reaction when the dough finally hits the hot oven. When you bake the chilled dough, the outer edges set quickly while the dense, moisture-locked center bakes slowly, resulting in the ultimate textural contrast. You are left with an incredibly chewy chocolate cookie that defies standard home-baking limitations.
Ultimately, the secret to the perfect bite was never about finding a magical, exotic ingredient, but rather unlocking the hidden scientific potential of the premium butter you already have in your refrigerator.